Purpose
Use this feature primarily for plating. There are many cases where the standard (step-down) hip joint (i.e., plumb cut) results in a plate larger than necessary because of a high-pitch or other condition in which the plate has difficulty getting enough plate area on the sloping chord. Often, that joint cannot be plated – even by entering the plate monitor and rotating the plate. One solution is to change the chord cuts – miter or use an angle-bisector. You can also change the joint entirely by passing one of the members through.
Note that you can edit only one joint at a time.
Steps
To edit the geometry of a joint:
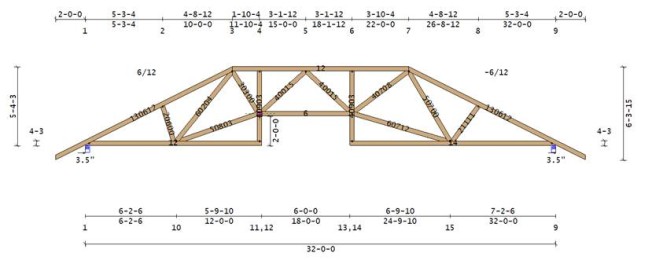
- Open the truss and select the joint to edit.
The selected joint is highlighted.
- From the Joint menu select Joint Geometry, click
 , or right-click to display menu and select.
 Notes:
-
While the joint is highlighted, you can also right-click to display the Joint menu.
-
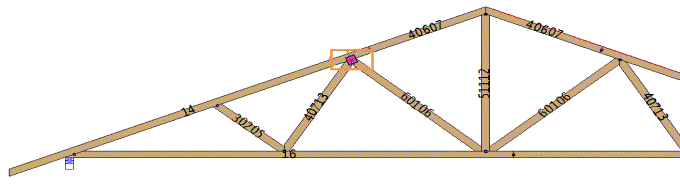
While in the Joint Geometry dialog, you can click on a web in the truss view and have the cutting pull-down menu for the selected web highlighted.
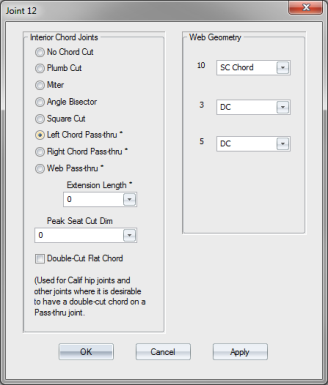
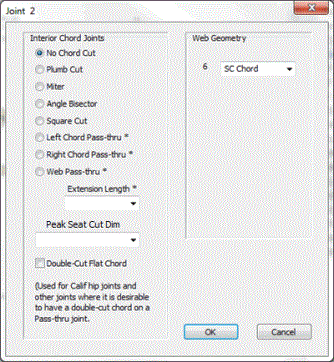
The Joint dialog displays.
3. While in the Joint Geometry dialog, after clicking a web, use the arrow keys to browse up and down the joint cutting options.
Note that the number of drop downs displayed (under Web Geometry) matches the number of webs at the selected joint.
Note: Webs are highlighted in a different color when hovering over the joint in Joint Geometry dialog. Select the highlight color on the Color Settings dialog.
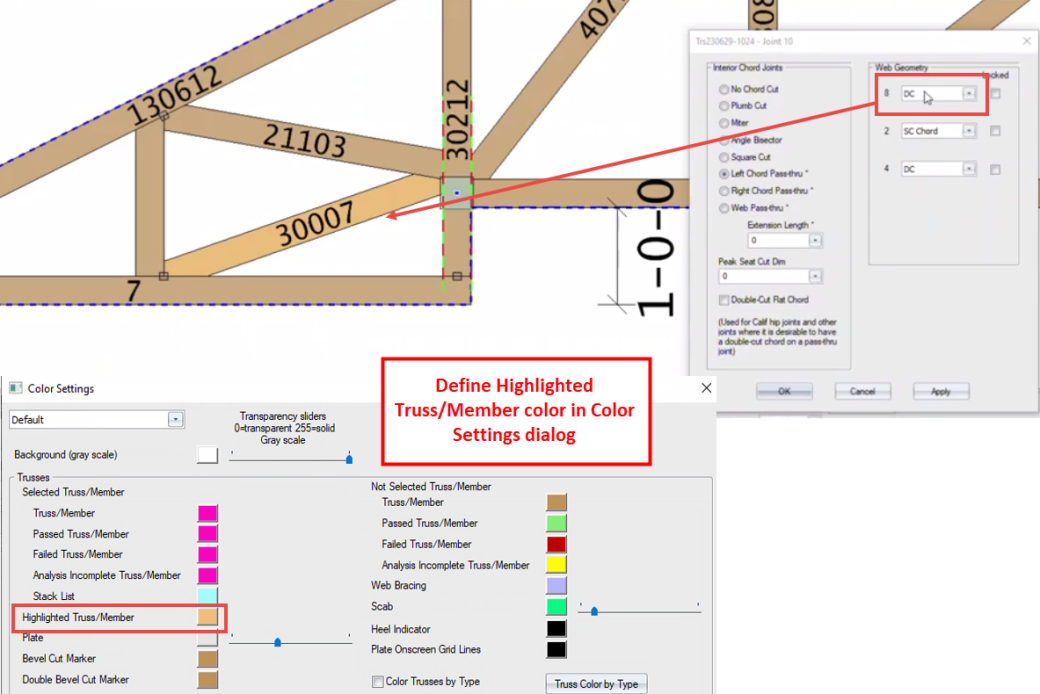
4. Choose from the following options on this dialog:
For Interior Chord Joints:
- No Chord Cut - default option if the selected joint is not spliced
- Plumb Cut - creates a splice that is perpendicular to the x-axis
- Miter Cut - applies a miter cut to a joint
- Angle Bisector Cut - makes the cut angle change to the bisecting angle
- Square Cut - applies a splice perpendicular to a joint
- Left & Right Chord Pass Thru - extends a chord without having to trim for a clerestory condition
- Web Pass Thru - extends a web through a chord
- Peak Seat Cut Dimension - add or override the seatcut width to be smaller or larger than the vertical web
- Double Cut Flat Chord - Coming soon
5. Select the appropriate option and click OK to update the selected joint.
Each web coming into the selected joint originates from another joint number. Those are the numbers listed in the joint geometry window.